 Everett
 Windows Built for Lake Stevens Weather
Lake Stevens homes sit inland from Puget Sound, but they still get the same weather pattern that moves through the rest of Snohomish County: long stretches of steady, driving rain, high humidity that never fully lets up, and a marine air mass that carries moisture even on days it isn't actively raining. Add in tree cover around much of the lake and surrounding neighborhoods, and you get a near year-round moss and algae season on shaded siding, trim, and window sills. None of this is dramatic weather. It's the slow, grinding kind that finds every weak seal and every gap in flashing over five, ten, fifteen years, and turns a small oversight into a rotted sill or a fogged-over pane.
Windows in this area don't fail because of one bad storm. They fail because water finds a way in a little at a time, and wood, drywall, and insulation don't dry out fast enough between rain events to recover. A window installation done right for Lake Stevens has to assume the wall behind it will get wet at some point and be built so that moisture sheds back out instead of soaking in.
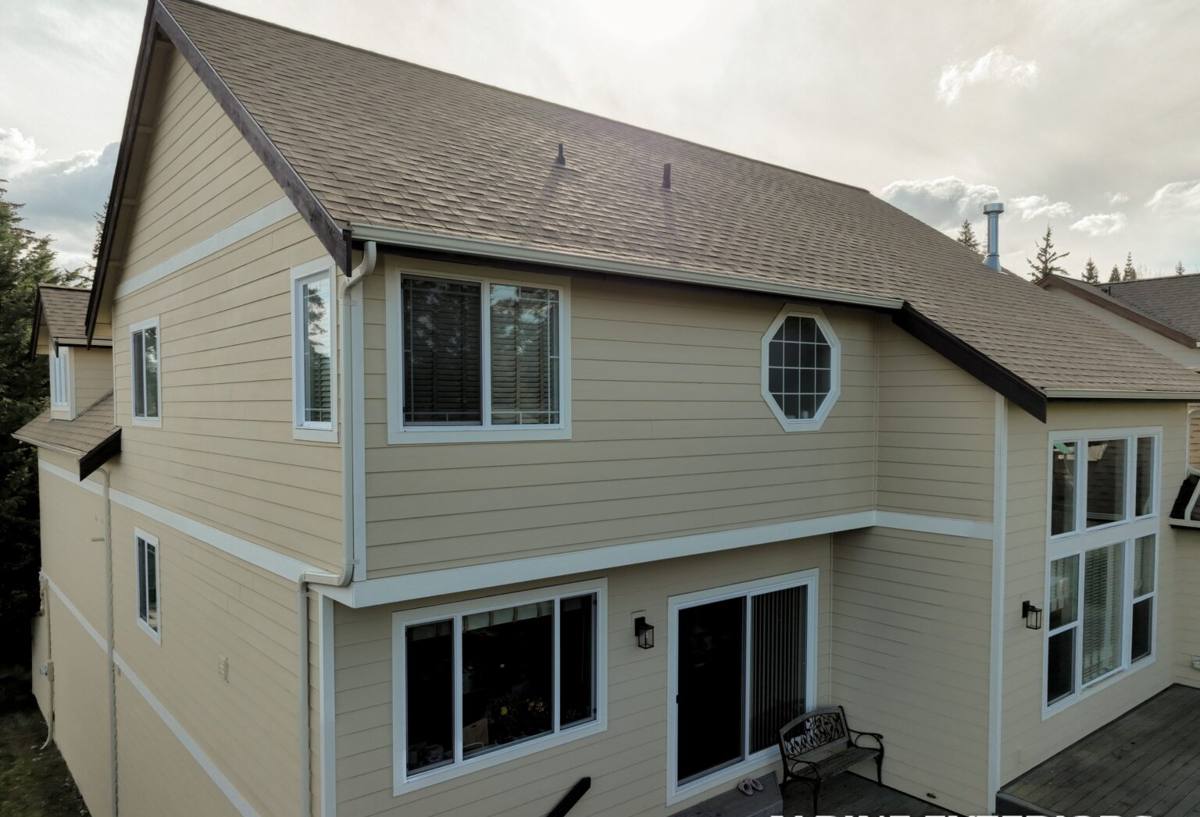
Signs a Lake Stevens Home Needs New Windows
Most homeowners don't call about windows until something is visibly wrong, but by then the damage is often already spreading into the framing. Here's what we look for, and what you should watch for too:
- Fogging or a visible haze between the panes of double-pane glass (the seal has failed and the gas fill is gone)
- Soft or spongy wood at the sill or the bottom corners of the frame
- Paint that's bubbling, peeling, or staining brown near the window trim
- Windows that are hard to open, close, or lock — often a sign the frame has swelled or shifted
- A cold draft near the window even when it's fully closed and locked
- Visible moss, algae, or black staining building up on the sill or lower trim
- Condensation forming on the inside of the glass regularly, even in mild weather
Any one of these on its own might just mean a caulking touch-up. Two or three together, especially on the same window, usually means it's time to talk about replacement rather than another patch.
What a Correct Window Installation Actually Involves
Removal and Opening Inspection
The old window comes out carefully so we can actually see the condition of the rough opening — the framing, sheathing, and any existing flashing or house wrap underneath. This is the point where hidden rot or past water intrusion shows up. Skipping a real inspection here is how a new window ends up installed over a problem that keeps growing behind it.
Flashing and Weatherproofing
This is the step that matters most in a climate like ours. Flashing tape and house wrap have to be layered correctly — top piece overlapping the one below it — so that any water that gets behind the siding sheds down and out, never sideways or up into the wall cavity. In a region with this much sustained rain, a flashing mistake doesn't show up right away. It shows up two or three years later as rot nobody can see until the drywall or siding comes off.
Setting, Shimming, and Sealing
The window gets set level and plumb, shimmed so it isn't relying on the frame to hold its shape, and sealed with the right sealant in the right locations — not just a bead of caulk around the outside trim. Interior air sealing (the gap between the window frame and the rough opening) matters just as much for keeping conditioned air in and drafts out.
Finish Work
Trim, caulking, and paint or stain get finished cleanly, with attention to the sill and any horizontal surface where water and, eventually, moss will want to sit. A sill with the right slight outward slope sheds water instead of holding it.
Choosing Windows for the Local Climate
There's no single "best" window for every home, but some choices hold up better than others given how much moisture this area sees over a window's lifespan. The table below covers the trade-offs we walk homeowners through most often.
| Frame Material | Moisture Behavior | Maintenance | Typical Lifespan |
|---|---|---|---|
| Vinyl | Won't rot or absorb water; seams are the main watch point | Low — occasional cleaning | 20-30+ years |
| Fiberglass | Very stable in wet, humid conditions; minimal expansion/contraction | Low | 30+ years |
| Aluminum-clad wood | Good exterior protection but any breach exposes wood underneath | Moderate — watch cladding seams | 20-30 years if maintained |
| Bare wood | Attractive but vulnerable to prolonged moisture exposure over time | High — regular repainting/sealing | Varies widely with upkeep |
We lean toward vinyl and fiberglass for most Lake Stevens replacement projects because they tolerate our wet season without the ongoing maintenance burden that painted wood or clad-wood frames carry. That's a practical recommendation based on how these materials hold up here over decades, not a knock on wood windows as a product — they can look great and perform well, they just ask more of the homeowner in a climate that rarely gives wood a long dry stretch to recover in.
How Our Process Works, Start to Finish
- On-site assessment — we look at your current windows, the condition of the surrounding trim and siding, and talk through what you actually need (energy performance, noise reduction, appearance, or just fixing failure points).
- Straightforward quote — a written estimate that spells out materials, scope, and what's included, so there's no guessing later.
- Scheduling around the weather — we plan installs to minimize how long any opening is exposed, and we don't start a whole-house job when a multi-day soaker is in the forecast.
- Installation — removal, inspection, flashing, setting, sealing, and finish work as described above, one opening at a time so your home is never left wide open.
- Walkthrough — we check operation, look at the finished trim and caulk lines with you, and make sure everything closes and locks the way it should.
Why a Crew That Already Works Lake Stevens Matters
Window installation is one of those jobs where the visible result (a clean, new window) can look identical whether the flashing underneath was done right or not — for a while. The difference shows up years later, in the walls, not on install day. A crew that works this area regularly has already seen what happens when flashing is rushed or a sill is left flat instead of sloped, because they've been the ones called back to fix it. That's a different starting point than a crew working from a generic checklist with no feel for how this specific climate behaves.
There's also a practical side to being local: we're not driving in from out of the area to quote a job, and we're not disappearing after the invoice clears. If a question comes up after the install, we're a short drive away, not a call center.
What Affects the Cost
Every home is different, so we won't quote a number without seeing the job, but these are the main factors that move a window installation estimate up or down:
| Factor | Why It Matters |
|---|---|
| Number of openings | More windows means more materials and labor, but per-window cost often drops slightly on larger jobs |
| Window size and type | Large picture windows, bays, or custom shapes cost more than standard double-hung units |
| Condition of the rough opening | Hidden rot or past water damage adds repair work before the new window can go in |
| Frame material | Vinyl is typically the most budget-friendly; fiberglass and clad-wood cost more upfront |
| Access and site conditions | Second-story windows, tight side yards, or landscaping in the way add time |
Broadly, homeowners in this area should expect per-window costs to range from a modest few hundred dollars for a straightforward standard-size vinyl replacement up to several times that for large or custom units — but the only accurate number comes from seeing your specific windows and openings in person.
After the Install: Keeping Moss and Moisture From Coming Back
A correctly installed window with good flashing and a properly sloped sill will resist the moss and staining that builds up on older windows, but it's not maintenance-free. A quick seasonal check goes a long way: keep sills and tracks clear of debris where moisture can sit, rinse off moss or algae buildup before it gets a foothold, and keep an eye on caulk lines for any cracking. Catching a small caulk gap before the next wet season is a five-minute fix; ignoring it for a year or two is how small problems become big ones again.
If your windows are showing any of the signs above, or you'd just like an honest read on whether repair or replacement makes more sense for your Lake Stevens home, we're happy to take a look. The estimate is free, there's no pressure, and you'll get a straight answer either way — just fill out the form below to get started.