 Everett
 New-Construction Windows in Bayside: Getting It Right Before Drywall Goes Up
When a home is being built from the ground up in the Bayside area, the window installation only gets one real shot to be done correctly. Once siding, trim, and interior finishes go on, fixing a poorly flashed or poorly sealed window means tearing back into finished work. That's a different situation than swapping out an old window in a house that's already standing, and it's why new-construction window work deserves its own process, not a shortcut version of a replacement job.
Bayside sits close enough to the water that salt-laden air, driving wind-driven rain, and a long stretch of gray, damp months every year are just part of building here. A window package and installation method that would be fine in a drier inland climate can start showing problems in this environment within a few seasons if it's not detailed correctly from the start. We build every new-construction window installation around that reality, not around what's easiest to install.
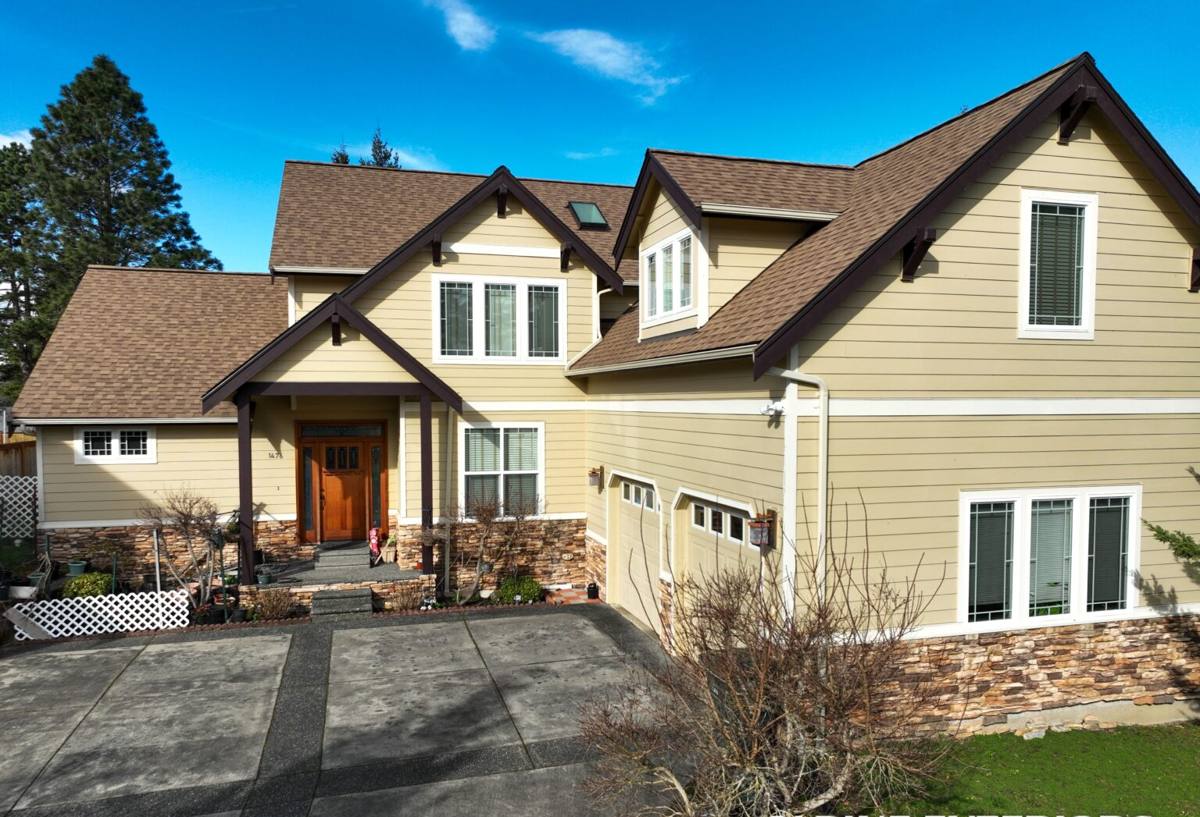
Why New-Construction Installation Is a Different Job Than Replacement
New-construction windows are typically installed with a nailing flange (also called a nail fin) that gets fastened directly to the wall sheathing before siding goes on. The window becomes part of the building's water management system from day one — it has to work together with the weather-resistive barrier (WRB), flashing tape, and sill pan as one continuous system. There's no old frame to work around and no existing finish to protect, but there's also no room for guessing, because everything gets covered up by siding and trim shortly after.
Replacement windows, by contrast, usually go into an existing opening with the old frame left in place or removed down to the rough opening, and the surrounding siding and trim are often untouched. The standards for a correct install are different, and a crew that mostly does replacement work isn't automatically equipped to detail a new-construction opening the way it needs to be done.
What This Means for a Bayside New Build
Because the flashing and water management details get buried under siding almost immediately, mistakes on a new-construction window install don't usually show up right away. They show up two, five, or ten years later as staining on interior sills, soft spots in wall framing, or mold behind drywall near window openings — problems that are expensive to trace back to their source. Getting the install right the first time matters more here than almost anywhere else in the build.
What Bayside's Climate Actually Does to a Window Installation
Everett and the surrounding Snohomish County waterfront see a combination of conditions that stress a window installation in specific ways:
- Salt air: Airborne salt accelerates corrosion on unprotected metal fasteners, hinges, and certain flashing materials, and it can degrade lower-grade finishes on frames over time.
- Driving, wind-driven rain: Storms off the Sound don't just fall straight down — wind pushes rain sideways and up under trim, which means flashing and sealant details at the head, jambs, and sill all have to actually work, not just look finished.
- A long moss and mildew season: Extended damp, low-light months encourage moss and mildew growth on any surface that stays wet, including window sills, trim, and the top edges of flashing if water isn't being shed properly.
- Temperature swings between seasons: Framing and window materials expand and contract, and joints that weren't sealed with the right flexible materials can open up small gaps over a few years.
None of these conditions are dramatic on their own, but combined and sustained year after year, they're exactly the kind of slow, cumulative stress that separates a window install that lasts decades from one that starts failing quietly within five to seven years.
The Anatomy of a Correct New-Construction Window Install
A properly installed new-construction window is really a small, layered water-management system built into the wall. Each layer has a job, and skipping or misordering any of them is where most long-term problems start.
Sill Pan First
Before the window ever goes into the opening, the rough sill should have a sloped, sealed sill pan — either a factory pan or one built up with flashing membrane — so that any water that does get past the window has a way to drain back out instead of sitting against the framing.
Flashing Sequence (Shingle-Lap Order)
Flashing tape and the WRB have to be layered like shingles on a roof: each layer overlaps the one below it so water is always directed outward and down, never into a seam. Jamb flashing goes on before the window, the window's nailing flange gets sealed and taped on the sides and top, and the WRB above the window laps back over the head flashing last.
Correct Fastening and Shimming
The window has to be set plumb, level, and square in the opening, shimmed at the right points so the frame isn't racked or bowed, and fastened per the manufacturer's schedule — not just nailed wherever is convenient. A frame installed slightly out of square can bind, leak at the corners, or fail its own warranty terms.
Interior and Exterior Sealant
Backer rod and the right sealant at the interior air seal, plus compatible exterior sealant at trim joints, close off both air leakage and secondary water paths. Using an incompatible sealant on the flashing tape or WRB can actually break the water seal rather than help it.
Choosing Window Materials for a Bayside New Build
Material choice matters more near the water than it does further inland, mainly because of how each frame material handles moisture, salt exposure, and long-term maintenance. We talk through these trade-offs honestly with every homeowner rather than pushing one option for every job.
| Frame Material | Coastal/Salt-Air Performance | Maintenance | Typical Fit |
|---|---|---|---|
| Vinyl | Good — won't corrode or rust; performs consistently in moisture | Low; occasional cleaning | Most budget-conscious new builds |
| Fiberglass | Very good — dimensionally stable through temperature and moisture swings | Low | Homeowners wanting longevity and slimmer sightlines |
| Wood-clad (metal or fiberglass exterior, wood interior) | Good on the exterior clad face; interior wood needs protection from any interior moisture | Moderate; interior finish upkeep | Homeowners prioritizing a wood interior look |
| Bare aluminum | Weaker near salt air unless properly finished; prone to corrosion and condensation without thermal breaks | Higher | Best avoided or used only with a quality factory finish and thermal break |
Glass package matters just as much as frame material. For this climate, we generally recommend double-pane, low-E coated glass with argon fill and a warm-edge spacer — it manages heat loss during the wet, gray months and helps control condensation on the interior glass surface, which is common in coastal, humid climates.
Our New-Construction Window Process
We coordinate directly with builders and general contractors so window installation fits cleanly into the framing and dry-in schedule rather than becoming a bottleneck.
- Plan review: We review window schedules, rough opening sizes, and elevation details against the actual framing before ordering, so openings match the windows and there are no surprises on install day.
- Rough opening prep and inspection: We check that openings are square, properly sized, and that sheathing and WRB are ready before setting any windows.
- Sill pan and flashing installation: Sill pans go in first, followed by jamb flashing, in the correct shingle-lap sequence.
- Window setting: Each window is set plumb, level, and square, shimmed correctly, and fastened per manufacturer specification.
- Head flashing and WRB integration: Head flashing and the housewrap above the window are integrated last, completing the drainage path before siding covers the wall.
- Interior air seal: Backer rod and sealant close the interior gap between the frame and rough opening for air and moisture control.
- Final walkthrough: Every opening gets checked for operation, seal, and squareness before we sign off and the crew moves to siding and trim.
Common Mistakes We See on New Builds Near the Water
Most window problems we get called out to diagnose in newer homes trace back to installation sequencing, not the windows themselves. A few patterns show up repeatedly:
- Flashing tape applied out of shingle-lap order, so water gets directed into a seam instead of around it.
- Missing or improperly built sill pans, leaving no drainage path if water does get past the window.
- Windows fastened before the frame was checked for square, leading to binding sashes and stressed corner seals.
- Incompatible sealants used between flashing tape, WRB, and trim materials, which can degrade the water barrier instead of reinforcing it.
- Head flashing installed before the upper WRB layer, reversing the shingle-lap order at the most exposed point on the window.
These aren't manufacturer defects — they're installation-sensitivity issues, and they're exactly why the sequence and detailing matter as much as the window product itself.
What Affects the Cost of New-Construction Window Installation
Every new build is different, so we avoid quoting a number until we've seen the plans, but a few factors consistently move the price up or down:
| Factor | How It Affects Cost |
|---|---|
| Number and size of openings | More and larger openings mean more material and labor hours |
| Frame material and glass package | Vinyl is typically the most economical; fiberglass and wood-clad cost more upfront but may reduce long-term maintenance |
| Building height and access | Second-story and hard-to-access openings require additional staging, lifts, or scaffolding |
| Flashing and WRB complexity | Custom shapes, bays, and openings near rooflines or decks take more time to detail correctly |
| Coordination with the build schedule | Working around a tight framing-to-dry-in window can affect crew scheduling and sequencing |
A Pre-Drywall and Move-In Checklist for New Homeowners
Once your windows are installed and the home is closer to finished, a few simple checks help confirm everything is performing as it should before warranty periods start ticking:
- Open and close every window and door to confirm smooth, even operation with no binding.
- Check that locks engage fully and evenly on both sides of the sash.
- Look at interior sills and the area below windows after the first heavy rain for any signs of moisture.
- Confirm exterior caulking and trim look continuous with no visible gaps at corners or joints.
- Ask your builder or installer for the window warranty documentation and keep it with your home records.
Why Hiring a Crew That Already Works in Bayside Matters
A crew that regularly installs windows in Bayside and the broader Everett area already knows how local wind direction, rain exposure, and seasonal moisture behave against a house near the water. That's not something you can fully substitute with a generic installation manual. We've built our flashing sequence, material recommendations, and scheduling around what actually holds up in this specific climate over years, not just what passes inspection on install day.
We also understand how to work alongside builders and general contractors without disrupting the framing-to-dry-in timeline, which matters on a new construction schedule where every trade is stacked tightly against the next.
Ready to Talk Through Your New Build?
If you're planning new construction in the Bayside area and want a window installation done right from the framing stage forward, we're happy to walk through your plans and answer questions with no pressure and no obligation. Use the form below to request a free estimate, and we'll get back to you to talk through your project.